Page Contents
Set up Websocket Proxy
In this article we will explain how to set up a WebSocket proxy to a WebSocket backend. With a WebSocket proxy, OpenLiteSpeed will forward traffic with the WebSocket upgrade request to the WebSocket backend specified in the WebSocket proxy. Traffic without this upgrade request can be served via a separate Context. This means you can keep your WebSocket application behind OpenLiteSpeed, both for security and efficient handling of connections. It also means you can take advantage of OpenLiteSpeed’s efficient service of static or dynamic content while still having WebSocket content on the same page. For more information about WebSocket and WebSocket proxies, please see our blog.
Have a Websocket Backend Ready
Assuming you have a backend WebSocket up and running on port 7681 at ws://domain.com:7681, you will need to test it to ensure it is working.
There are many tools available for such testing. You can either try some online tools such as Echo Test or download chrome extension tools like Simple WebSocket Client.
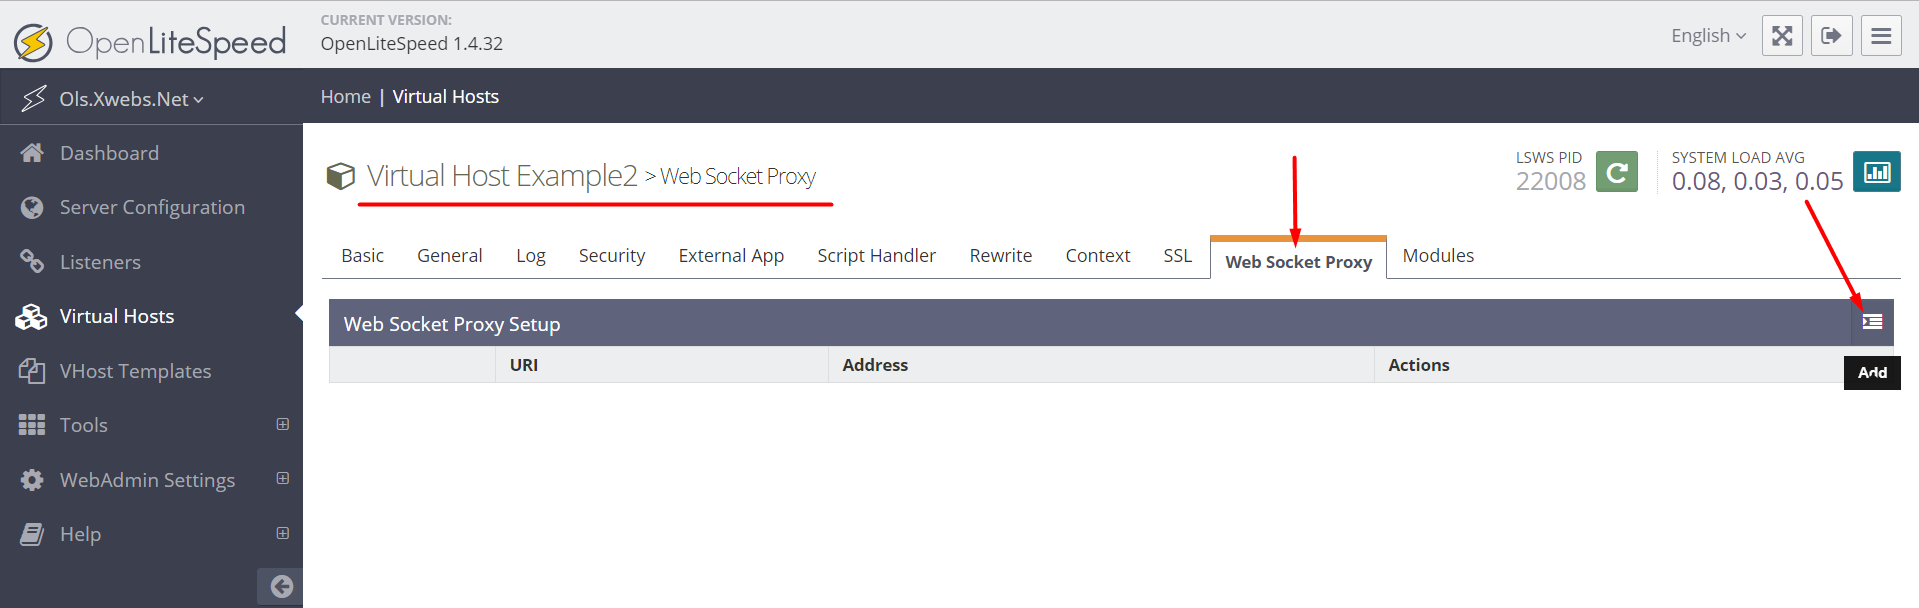
Add a Websocket Proxy to Your Virtual Host
The WebSocket Proxy tab is inside your virtual host settings (WebAdmin console > Virtual Hosts > your virtual host > WebSocket Proxy > Add).
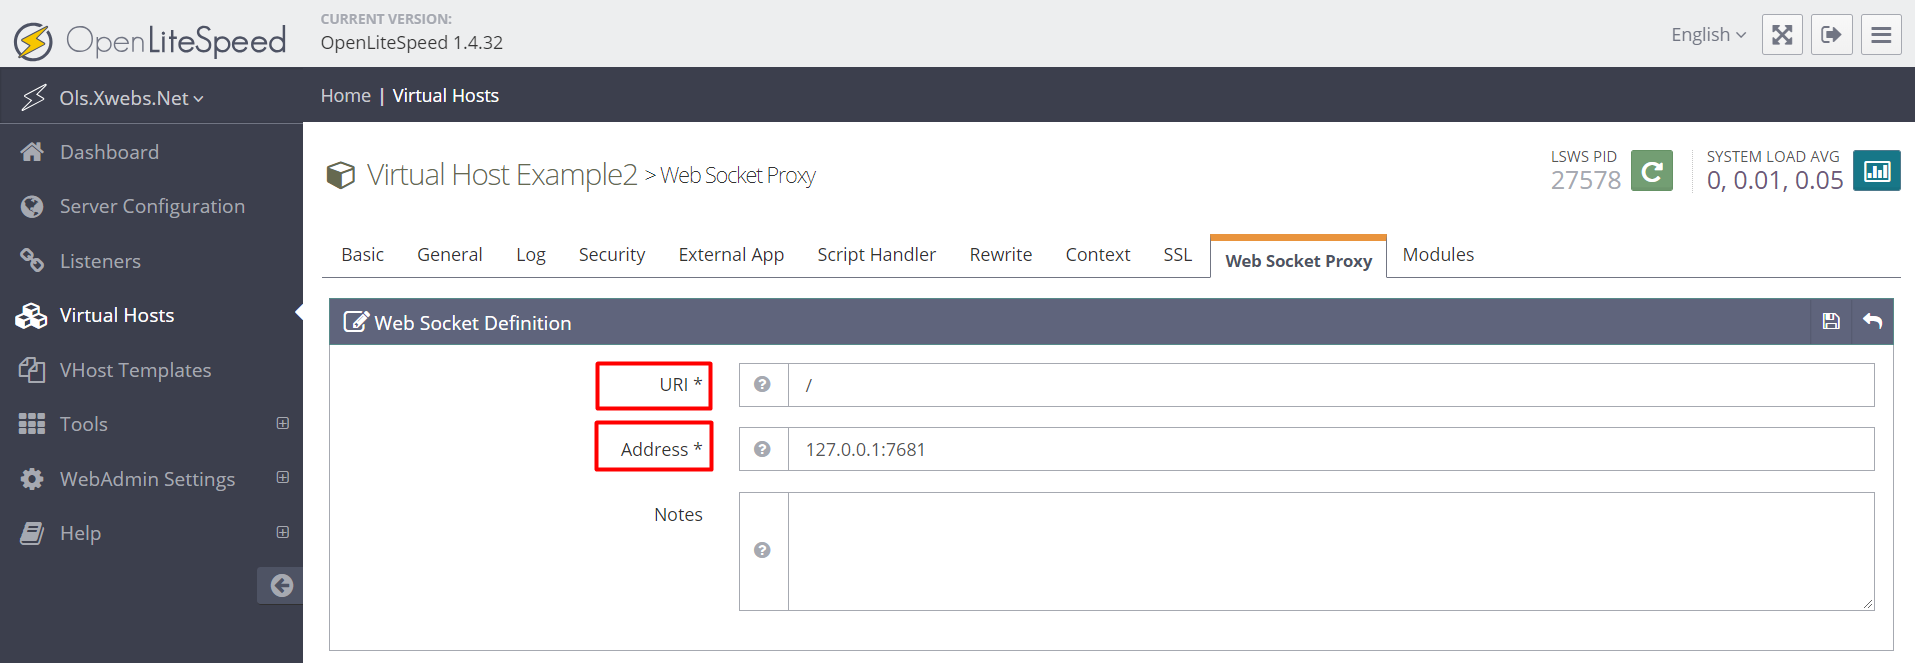
Enter the URI for your WebSocket application (relative to your virtual host’s domain) and the Address of the WebSocket backend.
If your backend server listens on 127.0.0.1:7681, so that’s your address value. You can configure your pages and backend to have the WebSocket application in a different URI and your backend at a different location.
Save the WebSocket proxy and graceful restart to apply changes.
Test It Out
Point your browser to http://yourIP:8088 (or wherever you put the WebSocket page, the default OLS example Virtual host will be on port 8088 while your real application may be on port 80 ) and your WebSocket page should come up, functioning better than ever.