Page Contents
Let’s Encrypt
Why choose Let’s Encrypt?
Let’s Encrypt is a free, automated, and open certificate authority brought to you by the non-profit Internet Security Research Group (ISRG)
Before Installing SSL
- Please install OpenLiteSpeed. You might want to follow one of these tutorials: 1Click or Repo install
- Please register a domain to your public IP, e.g. godaddy or some other free domain register, e.g. freenom.
Environment
We are going to install Let’s Encrypt with OLS on an AWS Linux server. Both OLS and Amazon Linux are not listed on the CertBot list but we are still able to install them using the following method.
Install CertBot
- Ubuntu 20.04 and 22.04
sudo apt-get update
sudo apt-get install certbot -y- Ubuntu 18.04
sudo apt-get update
sudo apt-get install software-properties-common
sudo add-apt-repository universe
sudo add-apt-repository ppa:certbot/certbot
sudo apt-get update
sudo apt-get install certbot- CentOS 9
sudo yum -y install certbot
- CentOS 8
wget https://dl.eff.org/certbot-auto
sudo mv certbot-auto /usr/local/bin/certbot-auto
sudo chown root /usr/local/bin/certbot-auto
sudo chmod 0755 /usr/local/bin/certbot-auto- CentOS 7
yum -y install yum-utils
yum-config-manager --enable rhui-REGION-rhel-server-extras rhui-REGION-rhel-server-optional
sudo yum install certbot
Apply Certificate
Method 1. Interactive
Run CertBot with the following command:
certbot certonly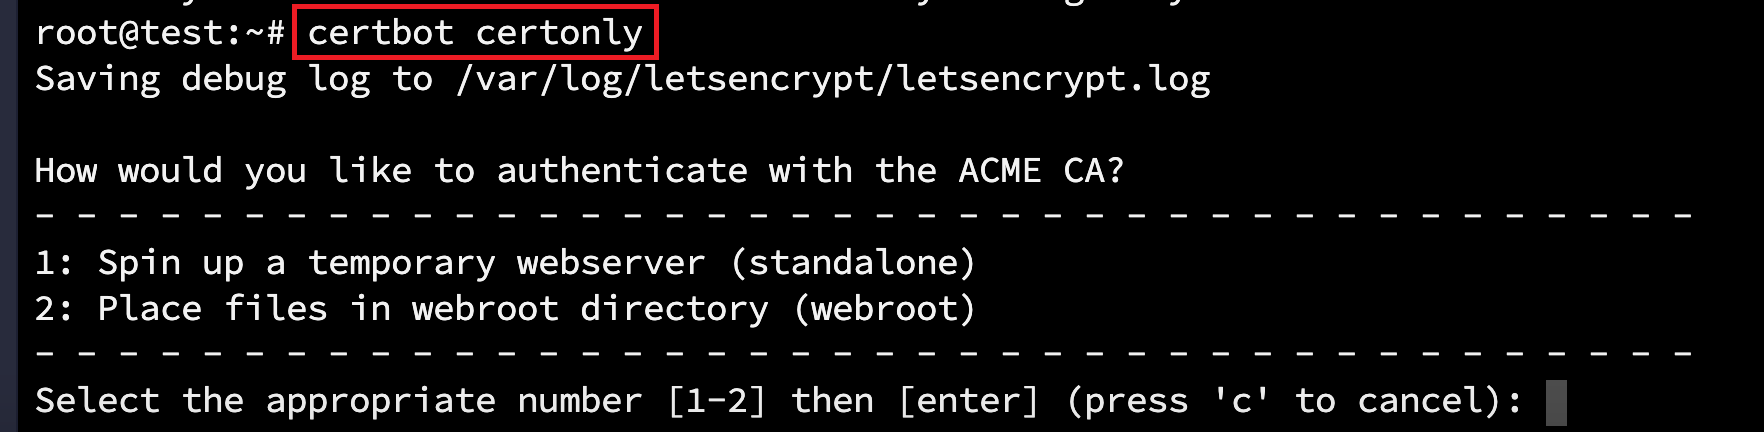
Answer the following questions to complete the installation process:
How would you like to authenticate with the ACME CA?
- Spin up a temporary webserver (standalone)
- Place files in webroot directory (webroot)
Select the appropriate number [1-2] then [enter] (press ‘c’ to cancel):
2
Enter email address (used for urgent renewal and security notices) (Enter ‘c’ to cancel):
YOUR_EMAIL
Please read the Terms of Service at https://letsencrypt.org/documents/LE-SA-v1.2-November-15-2017.pdf. You must agree in order to register with the ACME server at https://acme-v01.api.letsencrypt.org/directory
(A)gree/(C)ancel:
A
Would you be willing to share your email address with the Electronic Frontier Foundation, a founding partner of the Let’s Encrypt project and the non-profit organization that develops Certbot?
(Y)es/(N)o:
N
Please enter in your domain name(s) (comma and/or space separated) (Enter ‘c’ to cancel):
YOUR_DOMAIN
Input the webroot for YOUR_DOMAIN: (Enter ‘c’ to cancel):
/usr/local/lsws/Example/html
Waiting for verification… Cleaning up challenges
IMPORTANT NOTES: Congratulations! Your certificate and chain have been saved at:
/etc/letsencrypt/live/YOUR_DOMAIN/fullchain.pem
Your key file has been saved at:
/etc/letsencrypt/live/YOUR_DOMAIN/privkey.pem

Your cert will expire on DATE. To obtain a new or tweaked version of this certificate in the future, simply run "certbot-auto" again.
To non-interactively renew *all* of your certificates, run "certbot-auto renew"
Method 2. Non-Interactive
To apply for a certificate for example.com:
certbot certonly --non-interactive --agree-tos -m demo@gmail.com --webroot -w /var/www/html -d example.comTo apply for a certificate for both example.com and www.example.com:
certbot certonly --non-interactive --agree-tos -m demo@gmail.com --webroot -w /var/www/html -d example.com -d www.example.comMethod 3: For OLS as Reverse Proxy
If you are using OpenLiteSpeed as a reverse proxy, and the app context is /, then this is the best method for passing the CertBot validation.
Create a folder for CertBot validation:
mkdir -p /var/www/certbot/.well-known
Navigate to Web Admin > Virtual Host > Context, and add a static context with the following information:
- URI:
/.well-known/ - Location:
/var/www/certbot/.well-known/ - Accessible:
yes
Click the Save button and graceful restart the web server.
To apply for a certificate for example.com:
certbot certonly --non-interactive --agree-tos -m demo@gmail.com --webroot -w /var/www/certbot -d example.comTo apply for a certificate for both example.com and www.example.com:
certbot certonly --non-interactive --agree-tos -m demo@gmail.com --webroot -w /var/www/certbot -d example.com -d www.example.com
Automate the Certificate Renewal
Once we’ve installed CertBot, it will automatically set up a cronjob for renewal. We need only to add a deploy hook for OLS restart.
For Ubuntu:
Edit /etc/cron.d/certbot.
Change this:
0 */12 * * * root test -x /usr/bin/certbot -a \! -d /run/systemd/system && perl -e 'sleep int(rand(43200))' && certbot -q renew
to this:
0 */12 * * * root test -x /usr/bin/certbot -a \! -d /run/systemd/system && perl -e 'sleep int(rand(43200))' && certbot -q renew --deploy-hook "systemctl restart lsws"What if the CertBot Deploy Hook is not Triggered?
If your certificate renewal is successful, but for some reason, the deploy hook is not being triggered, you can run the following command. This will insert a restart lsws command into the CertBot cronjobs.
echo '0 0 * * 3 root systemctl restart lsws' | sudo tee -a /etc/cron.d/certbot > /dev/null
This particular example triggers a web server restart every Wednesday at Midnight. You can modify the 0 0 * * 3 part of the command to adjust the schedule, if needed.
For CentOS:
Edit /etc/crontab.
Change this:
0 0,12 * * * root python3 -c 'import random; import time; time.sleep(random.random() * 3600)' && /usr/local/bin/certbot renew -qto this:
0 0,12 * * * root python3 -c 'import random; import time; time.sleep(random.random() * 3600)' && /usr/local/bin/certbot renew -q --deploy-hook 'systemctl restart lsws'
Configure OpenLiteSpeed for SSL
If we have only one certificate, we can set it on the listener level.
Navigate to OpenLiteSpeed > Web Console > Listeners > SSL > SSL Private Key & Certificate
Set the following values:
- Private Key File:
/etc/letsencrypt/live/YOUR_DOMAIN/privkey.pem - Certificate File:
/etc/letsencrypt/live/YOUR_DOMAIN/fullchain.pem
Set Chained Certificate to Yes, click SAVE, and do a Graceful restart.
Configure for Multiple SSL
The SSL certificate in the virtual host will overwrite the listener, so we can just add the certificate to the virtual host for each domain.
Navigate to OpenLiteSpeed > Web Console > Virtual Hosts > YOUR VIRTUAL HOST > SSL > SSL Private Key & Certificate
Set the following values:
- Private Key File:
/etc/letsencrypt/live/YOUR_DOMAIN/privkey.pem - Certificate File:
/etc/letsencrypt/live/YOUR_DOMAIN/fullchain.pem
Set Chained Certificate to Yes, click SAVE, and do a Graceful restart.
Verify SSL
View Certificate
Open your site with the HTTPS protocol. Click Secure to view site information.
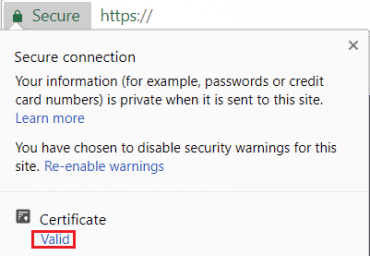
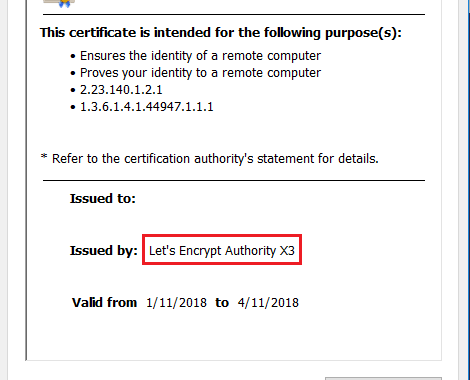
View Issuer
Click Valid, then you will see certificate information which should include Issued by Let’s Encrypt.
View Cert Valid Date
openssl x509 -noout -dates -in /etc/letsencrypt/live/YOUR_DOMAIN/cert.pemYou should see something like this:
- notBefore=May 17 23:32:14 2021 GMT
- notAfter=Aug 15 23:32:14 2021 GMT